
Redacting text means that you hide sensitive information from the view of the general public. You see this a lot in the government when entire sections of content are blacked out. This is to prevent private and confidential information from being readily available.
It’s important to note that redacting text should not alter the content of your posts and pages. While some tools may require you to manually delete keywords or phrases, most will leave the content while adding shortcodes to hide it.
In this tutorial, we’ll show you how to redact text in the easiest way for WordPress.
Why Would You Want to Redact Text? #
Since you are in complete control of the content on your website, it might be hard to imagine a situation where you want to actually redact text. However, there are multiple examples that make redaction a useful feature.
For example, if your page contains an actual document like a job application. You could redact the important personal information like your address, email, social security number, and more.
Another excellent choice is to use it as a makeshift paywall for visitors. For example, if you run a pay-per-view website, you might want to show a bit of the page or post to entice new visitors. A good way to block the rest of the text is to use redaction.
A more fun approach you can take is to make a game out of it. You can create some “classified” documents that visitors need to use clues to figure out what’s written.
As you can see, there are quite a lot of uses for redaction in the hands of a creative web developer.
How to Redact Text in WordPress #
Step 1: Installing Eyes Only #
The Eyes Only plugin was designed to make redacting text as simple as possible. There isn’t anything fancy about it; simply wrap the text you want to be redacted in a shortcode, and you are done. It’s really that easy.
Note: This plugin works with both the Gutenberg and Classic editor, but it is worth pointing out that only the classic editor adds an actual redact button to your toolbar. This allows you to highlight the text you want, press the button, and the plugin will wrap it in the shortcode.
Learning how to redact text in WordPress is pretty simple, so let’s get right into it.
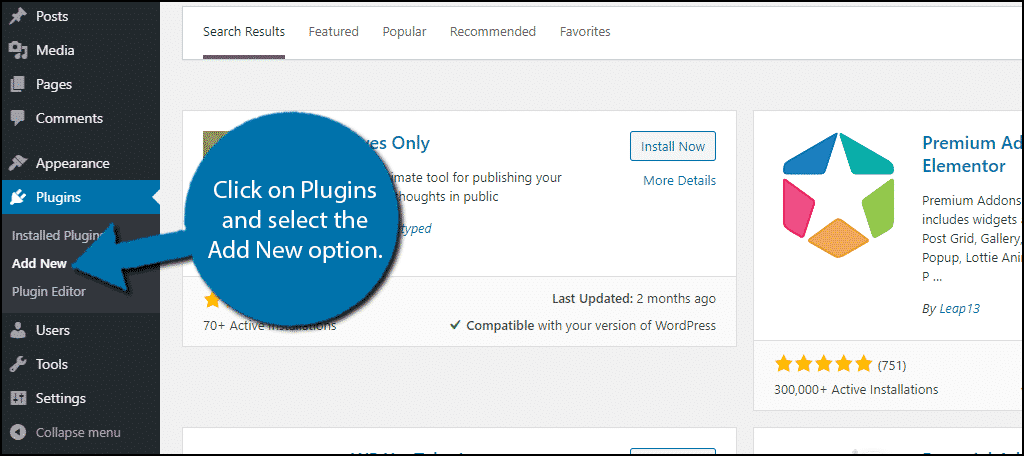
Let’s start by clicking on Plugins and selecting the Add New option on the left-hand admin panel.
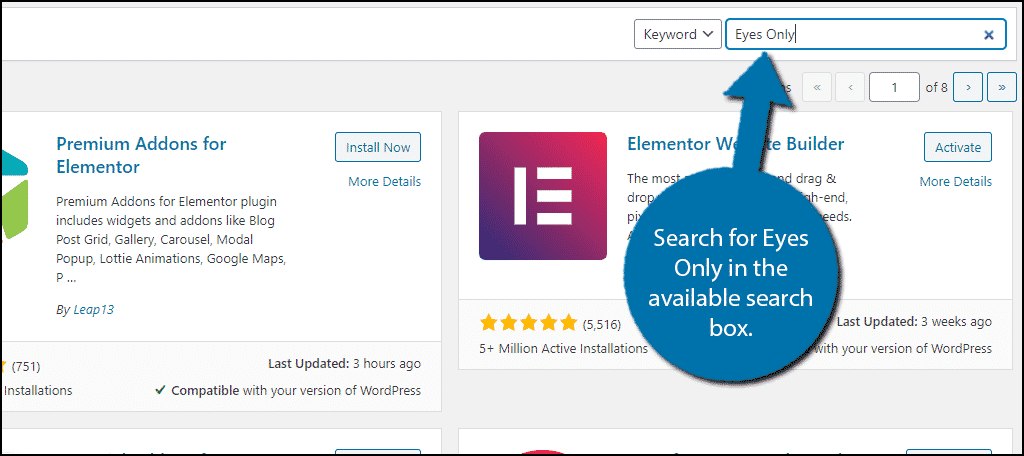
Search for Eyes Only in the available search box. This will pull up additional plugins that you may find helpful.
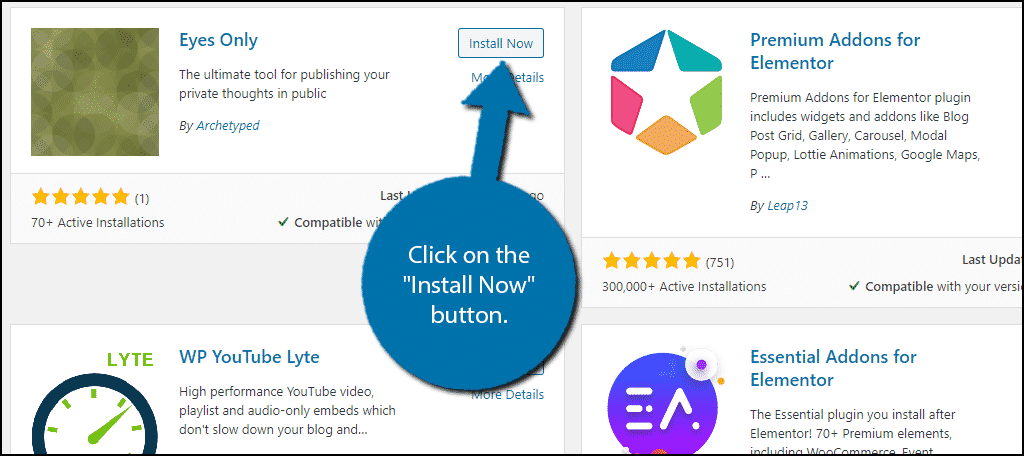
Scroll down until you find the Eyes Only plugin and click on the “Install Now” button and activate the plugin for use.
Step 2: Manually Redacting Text #
There are no settings to configure, so once you install the plugin you are ready to redact text. First, I will demonstrate how to redact text by manually wrapping it with a shortcode.
Go to any existing page or post you want to redact text on. Alternatively, you can create a new one for testing purposes. Locate the text you want to redact and wrap it in the following shortcode:
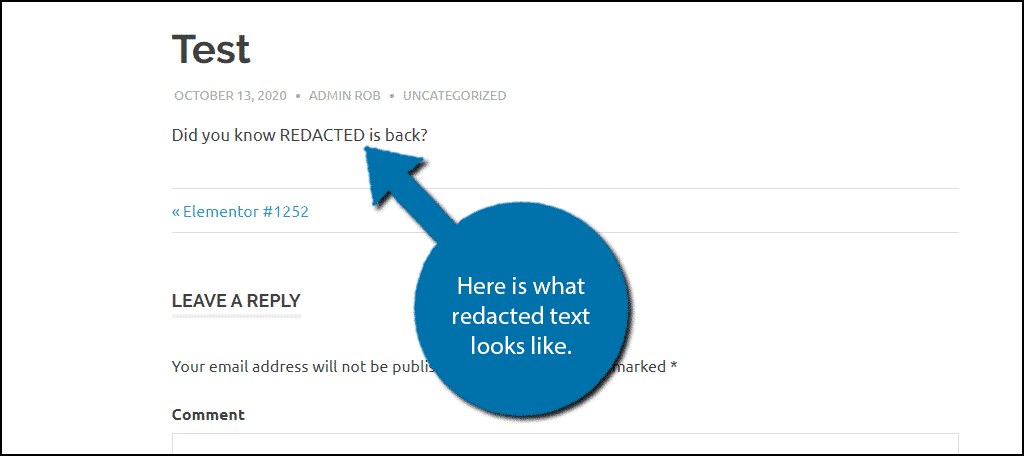
Anything within the shortcode will be replaced with the word REDACTED. This includes entire sentences.
For example, if you wrapped the phrase “Hello good sir” in the shortcode, you would only see the word REDACTED once. Thus not only does this hide a word, but entire sentences.
Here is how it would appear on a website:
Note: If you are logged in as the administrator, you will not actually see any text redacted. Instead, you need to log out or open an incognito window.
If you use the Classic editor, you will see a Redact Text button on your toolbar. It will wrap any highlighted text for you. This is not available in Gutenberg.
As you can see, it’s really easy to redact text with this plugin. However, what if you wanted to redact the same piece of information on multiple pages?
Step 3: Using Automatic Redaction #
If you want to redact a specific piece of information that appears throughout your website, going one post or page at a time can take a long time on bigger websites. Luckily, the plugin provides a solution, automatic redaction.
Note: At the time of writing, this feature seems to no longer work. However, since it has worked in the past and may work in the future, I will explain it anyway.
Click on Settings and select the Eyes Only option.
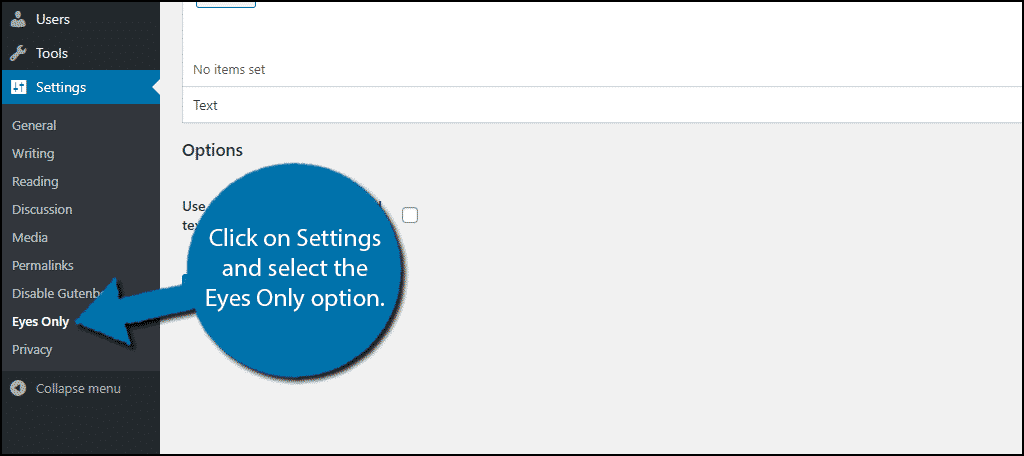
While this is listed under settings, there are no actual settings. Instead, this is where you can add and remove automatic redactions on your website. However, before going forward, take a moment to consider what you are redacting.
For example, if you are going to redact a generic word on your website, you could inadvertently make text hard to read in other areas. To avoid this, make sure that the word or phrase you are redacting is very unique.
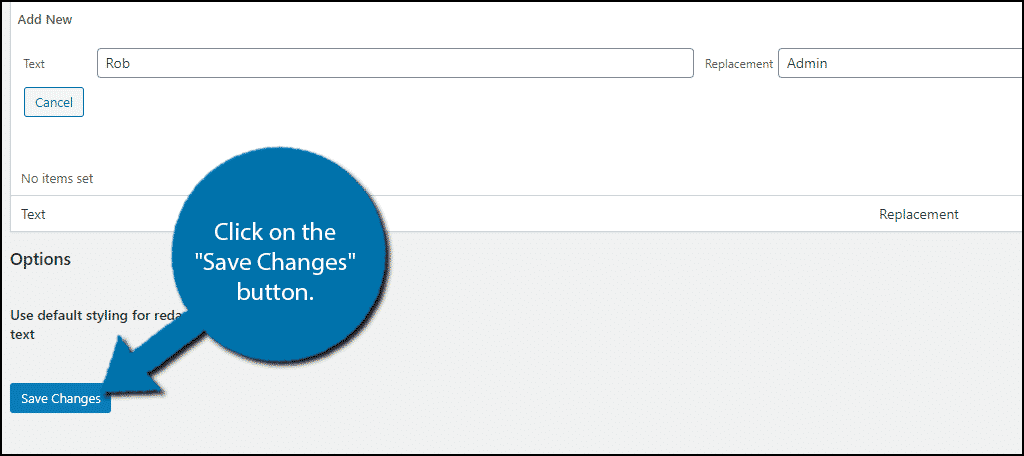
At the top, you will notice an “Add New” button. This allows you to add a new text redaction to your website.
You will see a text box asking you for the phrase you want to redact and what you want to replace it with. This allows you to not use the default REDACTED. Simply enter the information and click on the “Save Changes” button.
Congratulations on learning how to redact text in WordPress. If you delete the plugin, all redacted text will be fully visible on your website.
Is Redacting Text Really Necessary? #
While there are certainly some creative uses for it, I would have to say no. If you don’t want to display certain information, simply don’t write it. You can also take advantage of private posts in WordPress to make sure only people that should view it do.
For example, if you don’t want your email visible, don’t add it or use a fake one like “[email protected]” or something more creative. The same point could be made for other important information.
The point is WordPress allows you to control what is visible on your website. While there are some creative uses, redacting text is somewhat outdated in 2020.
Consider Utilizing Roles in WordPress Instead #
WordPress user roles are often times underutilized by web developers. Not only can you assign roles to your employees (writers, editors, etc.), you can also assign roles to your visitors. In fact, this is how a lot of pay-per-view websites work.
Typically, you pay some fee or simply take the time to sign up and you are assigned a role that can view specific content. For example, if someone decides to support you on Patreon, you can create a Patron user role to allow them to view content early.
This is far more common and just looks better on a standard website or blog. It also gives you far more creative control over your content.
What kinds of things would you like to redact in WordPress? What kinds of security measures do you have in place to protect the content of your site?


