According to various search engines, such as Google, secure websites will be held in higher regards when determining rank. This means that your site could be rated higher if it begins with the “HTTPS:” prefix. This is because secure socket layers protect visitors from several types of fraud by encrypting the transmission of data. It makes it far more difficult to “snoop” and steal information in this manner.
When you want to protect your users while simultaneously improving the search ranking of your pages, installing a WordPress SSL certificate is one of the easiest and cost-efficient ways.
What is an SSL Certificate? #
Before I show you how to install and SSL, let’s take a look at what exactly they are. An SSL certificate is actually a bunch of small data files that digitally bind a cryptographic key to an organization’s details.
SSL stands for Secure Sockets Layer, which is a global standard security technology. This enables encrypted communication between a web browser and a web server.
When you install one on your website (webserver), it activates the padlock and the https protocol. This allows secure connections from a web server to a browser. In year’s past. an SSL certificate would usually only be found on websites that were performing financial transactions and taking personal information.
As time went by, they became popular for all social media sites. Then, Google started encouraging all sites to have an SSL. At this point, it is highly recommended to have one. Essentially, an SSL certificate binds the following two things together:
- A domain name, server, or hostname.
- An organizational identity (like a company name) and a location.
How Much Extra Are SSL Certificates Per Year? #
The actual cost of the SSL certificate will vary from one hosting provider to the next. You’ll also need to take into consideration which SSL you need. For example, a standard certificate for personal and business websites could be significantly less when compared to higher security offered for eCommerce.
GreenGeeks actually offers a free wildcard SSL with our hosting plans.
Features like multi-domain (SAN), domain validation, self-signed, SSL warranties, and other options will also play a role in cost per year.
Installing the SSL Certificate on Your WordPress Site #
Installation of the WordPress SSL certificate is relatively simple. There is very little coding or changes involved on your side. In a very short amount of time, you can offer secure pages to your visitors while improving your online authority. While you could manually make changes for redirects, it’s much simpler if you utilize the right plugin.
Getting the SSL Certificate #
To start, you need to purchase the SSL from your hosting provider or obtain your free Wildcard SSL Certificate from GreenGeeks. Some services will allow you to transfer the certificate from third parties.
However, it’s probably a good idea to make sure you don’t already have one available. If you have a different hosting plan, you could have been set up with the SSL as a default. You find this out by contacting your web hosting provider.
Installing the SSL Certificate #
Once you have purchased the SSL, it needs to be installed. This is done by deciding which domain will have the certificate. If you have a hosting account with unlimited domains and maintain more than one website, you’ll need to choose which is getting the new SSL.
If you have a hosting plan with us, then you can do it fairly easily from your account admin area. We have a one-click installer that is simple to use.
Using a Plugin to Make the Necessary Changes #
Using a plugin can take a great deal of the work out of using the SSL for your site. Many of these will automatically make the necessary changes once your certificate has been purchased.
Some will set up the site just by activating the plugin without requiring additional input from yourself. Here are a few of the best SSL plugins for WordPress. You can search for and access all of the plugins below from the plugins page of your WordPress admin dashboard.
Simply search the plugin name and install and activate it right from there. Once the plugin has been installed and activated you can go through the process you need by heading to the relevant settings page for each plugin.
Really Simple SSL #
The Really Simple SSL plugin requires no additional setup outside of installation and activation. It will automatically make the changes to the .htaccess file if the SSL is detected on your site. You can also view the configuration settings of what has been controlled by the plugin.
This plugin is ideal for a smooth, clean, transition process to SSL.
Cloudflare Flexible SSL #

For those who use Cloudflare for their SSL, this plugin will automatically install all needed changes enabling Flexible SSL on WordPress and preventing infinite redirect loops when loading WordPress sites. This is another one of those plugins that will make the appropriate changes once it has been installed and activated.
The Cloudfare Flexible SSL is simply the best way to perform this process if you use Cloudfare for your SSL. Give it a look.
WP Force SSL #
WP Force SSL is a plugin designed to prevent pages and posts from being accessed through HTTP rather than the secure HTTPS. It automatically redirects all traffic of your site to the correct certificate-driven content. This plugin will make the necessary adjustments for you.
All of the plugins above will help you easily transition to an SSL and go from the HTTP to HTTPS protocol. The one you choose may be based on personal preference, ease of use, or need.
Modifying Your WordPress Settings #
After installing the plugin to govern your SSL, it’s time to change the settings in WordPress. The process isn’t difficult. From your dashboard, click on Settings > General.
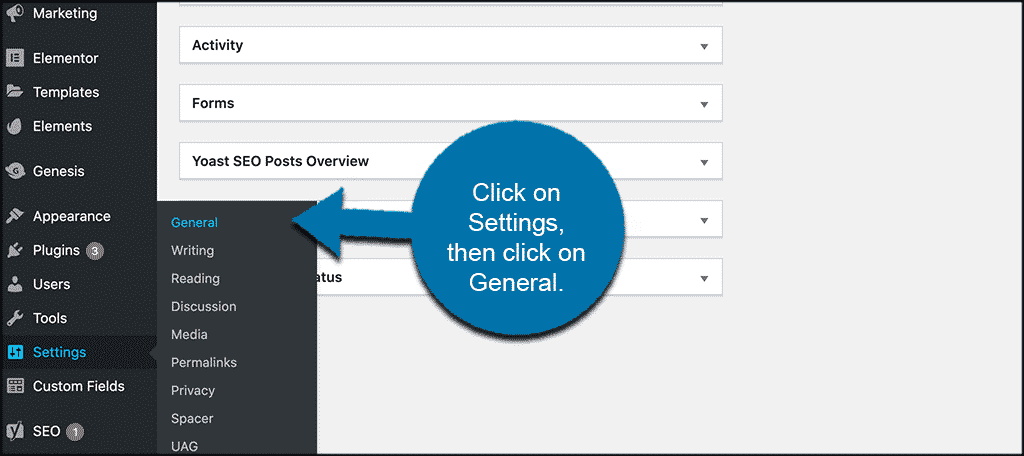
You will see a text box for “Site Address.” Make sure your domain’s prefix shows “https.” This will help the redirect of your secure content and will solve a few problems with posts and pages not showing correctly.

You can also modify the .htaccess page manually if you feel like doing it that way and understand how. Take a quick look at how to do this below.
Modifying the .htaccess Page Manually #
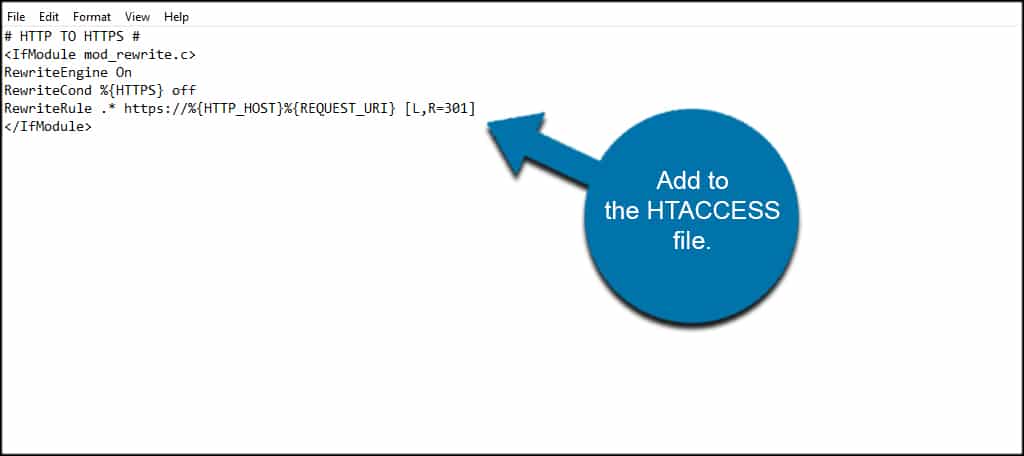
Should you want to modify the .htaccess manually, the coding is quite simple. Just open the file in an editor and enter the following lines:
Final Thoughts #
Setting up a WordPress SSL certificate is less troublesome than what you might think. It can help visitors feel confident in your pages while enhancing how the world views your site in search engines.
Think of the expense as a way to enhance the marketing capabilities of your website. Your content could be more readily available in comparison to competitors just by having the SSL installed on the domain. Plus, since Google has started putting more weight and ranking on sites that carry an SSL, it is definitely a good idea to make the switch if you haven’t already.
What kind of security measures do you have on your WordPress site? Do you think the extra cost per year is worth the security and effort of the SSL?


